How to Scan a Document on HP Printer
By Deependra Pangeni Deependra Pangeni Computer Engineer ( B.E. in Comp Eng ) Meet Deependra Pangeni, A professional Computer Engineer who has been writing about technology for many years. He is also involved in different robotic projects and loves tinkering with circuit boards. Full Bio
Learn about our editorial policies Updated March 21, 2023

If your HP printer has an integrated scanner assembly, you can quickly scan your documents and save them in a digital format. The scanner assembly can be flatbed or Automatic Document Feeder (ADF). The flatbed scanner allows you to scan a single standard-size document at once but the latter supports scanning multiple documents.
If you want to scan the documents with more smart functions, you can use the HP Smart app or HP Assistant tool or use the Windows Fax and Scan application—a built-in scanning tool on Windows computers.
Using Windows Fax and Scan
Here’re the steps to scan your documents on an HP printer using the Windows Fax and Scan application.
- Place the document to be scanned on the scanner bed, facing the scanning side downwards.
- If there are multiple documents, place them in the Automatic Document Feeder (ADF). But here, you should face the scanning side upwards.
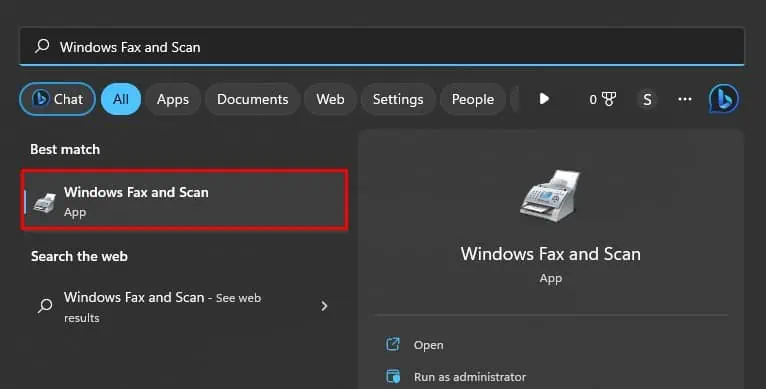
- Launch Windows Fax and Scan app on your PC.
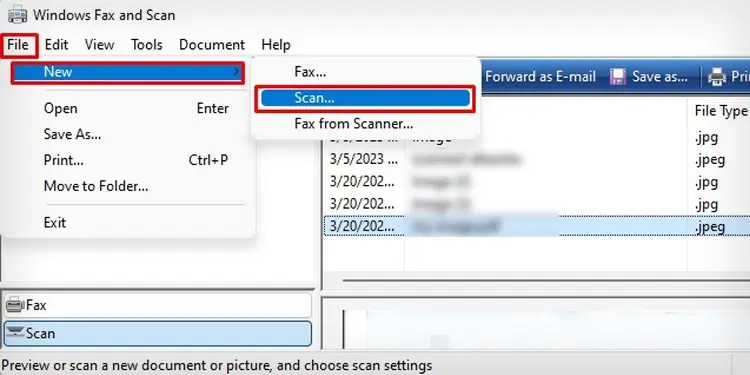
- Click File >New >Scan.
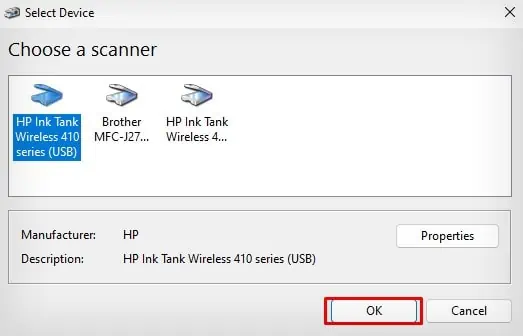
- Choose the HP printer on the next window and click OK.
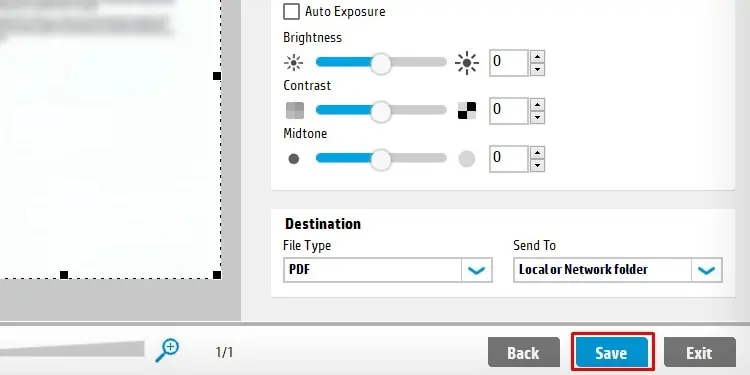
- A New Scan window will open. You may change the color format, file type, brightness and contrast on this window.
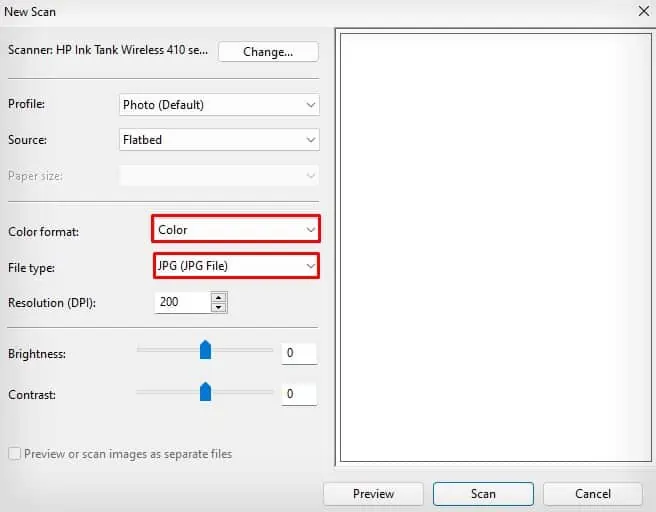
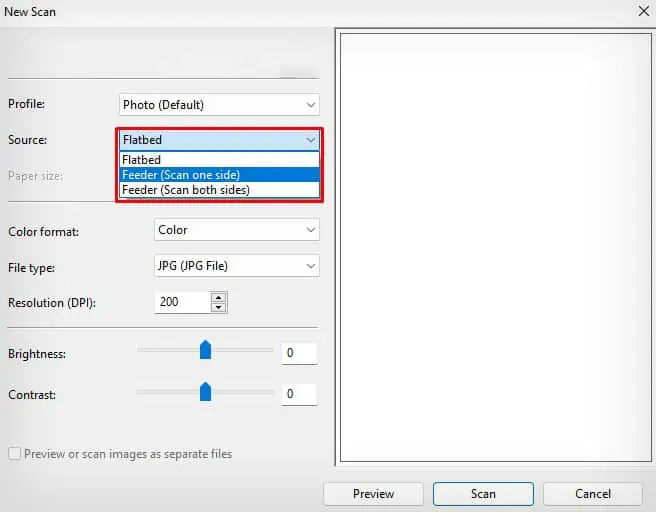
- If you have inserted the documents on the ADF, you need to change the Source to Feeder. Else, leave it on Flatbed.
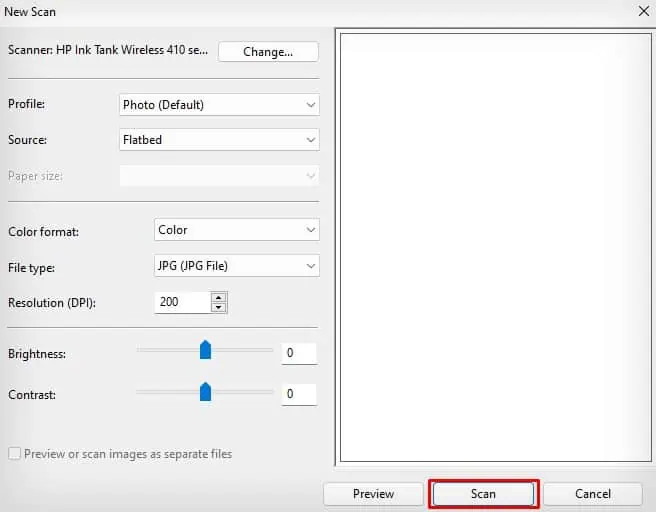
- Then click the Scan button.
- Once the scanning is complete, you will see the scanned document on the screen.
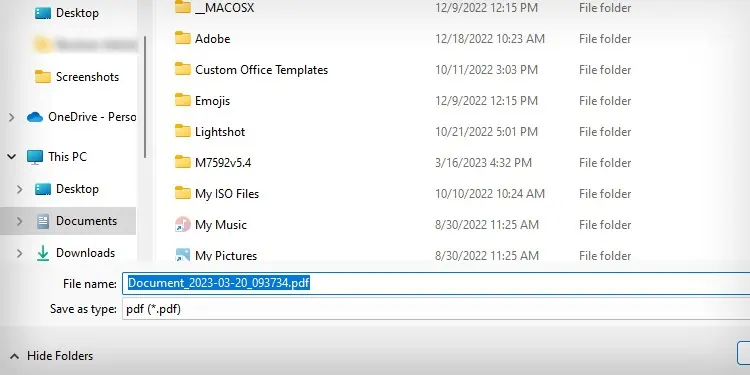
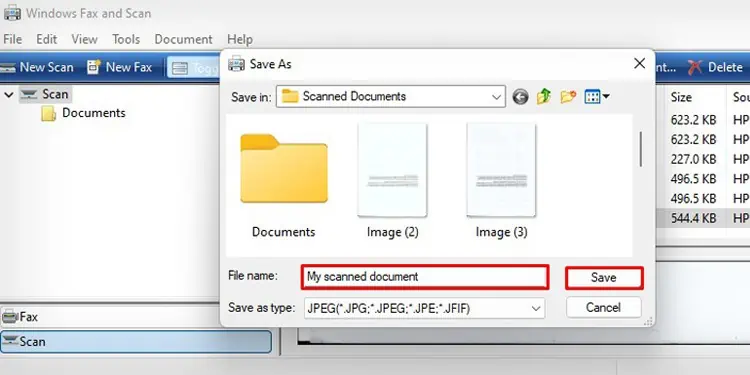
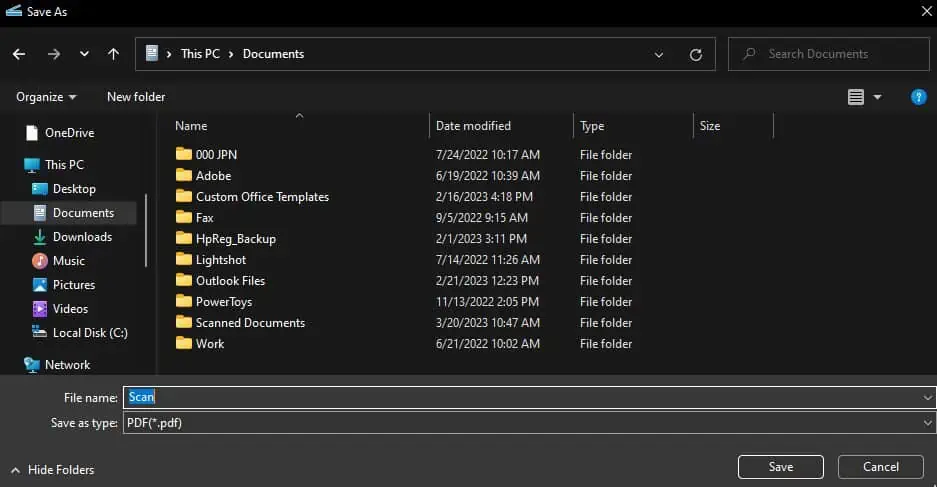
- Click the Save as button on the menu bar.
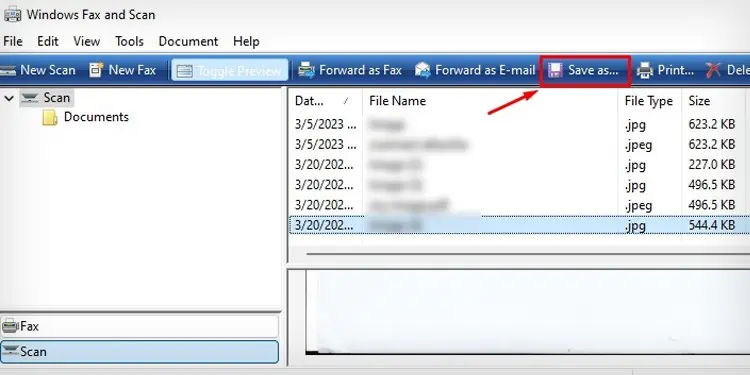
- Give a name to your scanned document, choose a file type, and click Save.
Using HP Assistant Tool
Here’s how to scan your documents on an HP printer using the HP Printer Assistant tool.
- First, place the document you want to scan on the scanner bed of your printer. Face the scanning side downwards and place it properly, leaving some margins on the side. Then close the scanner lid.
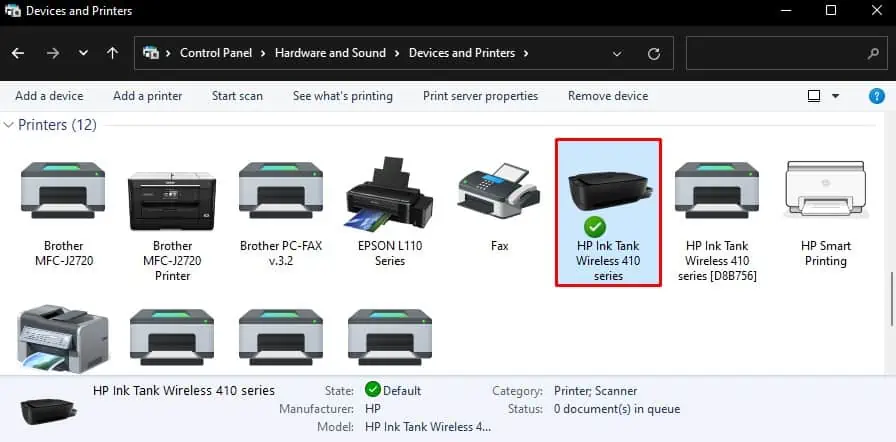
- Now, press the Windows and R keys on your keyboard simultaneously.
- Type control printers and press Enter.

- Look for your HP printer and double-click it.
- Open HP Printer Assistant.
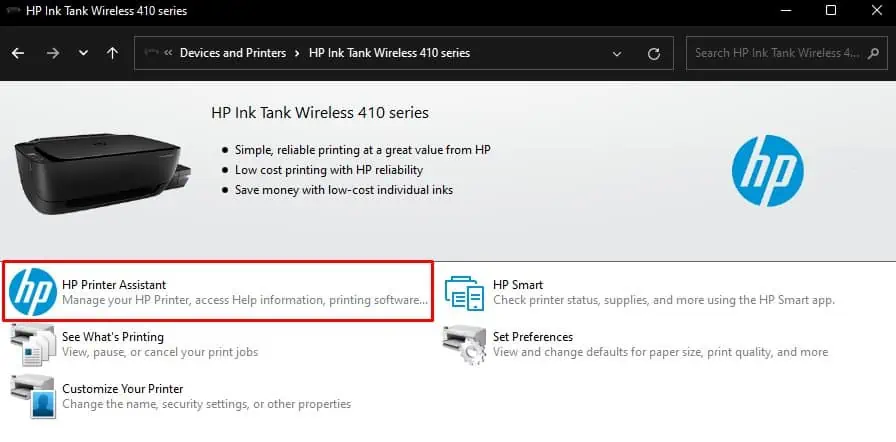
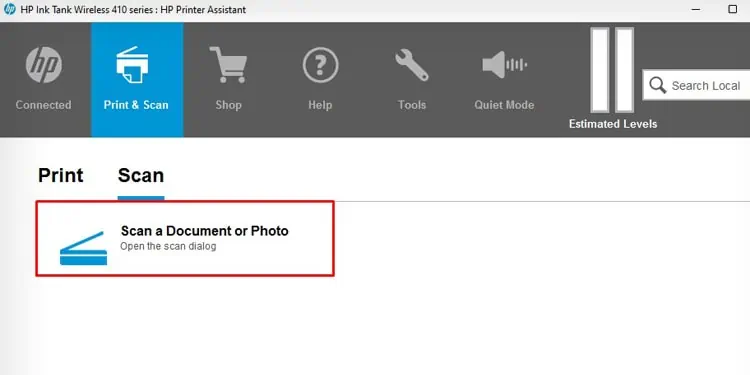
- Click Scan.
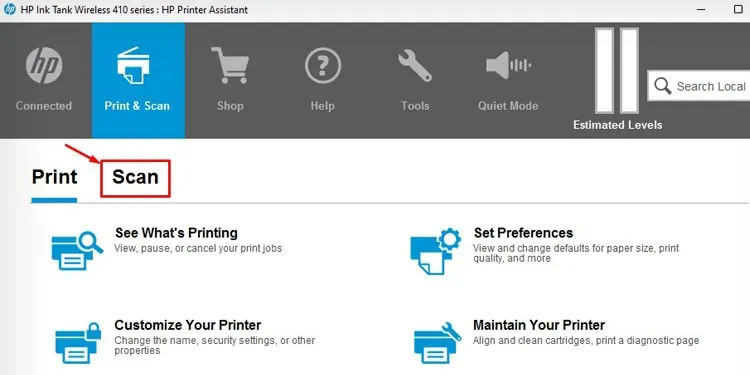
- Now click Scan a Document or Photo.
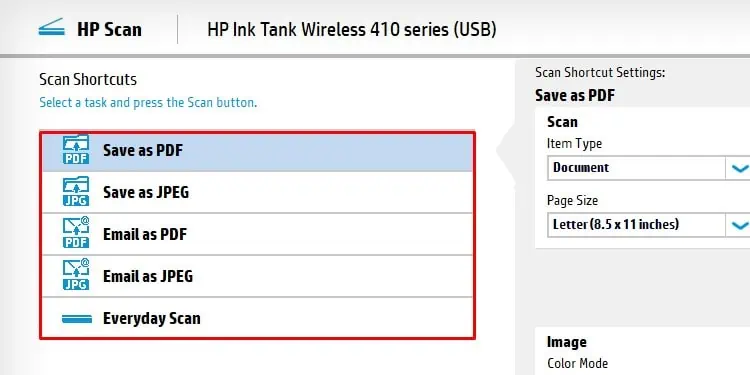
- Once the HP Scan window opens, choose whether you want to save the scanned document as a JPEG or PDF file.
- You can also choose the Color Mode and Page Size of the document.
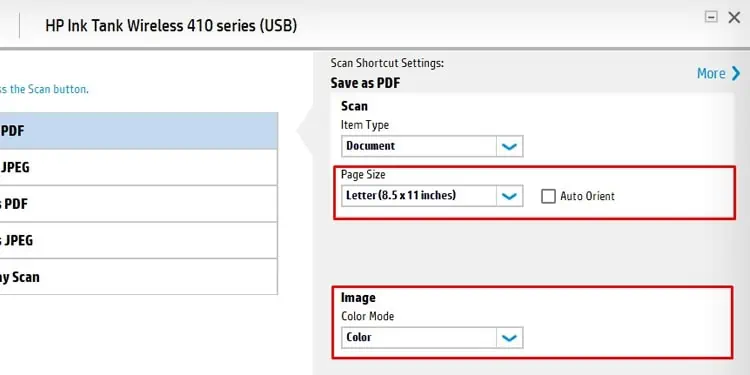
- Click the More option for other advanced scan settings and adjust it as per your need.
- Click Scan and wait till you see the preview of the scan.
- Open the scanned image by double-clicking the thumbnail.
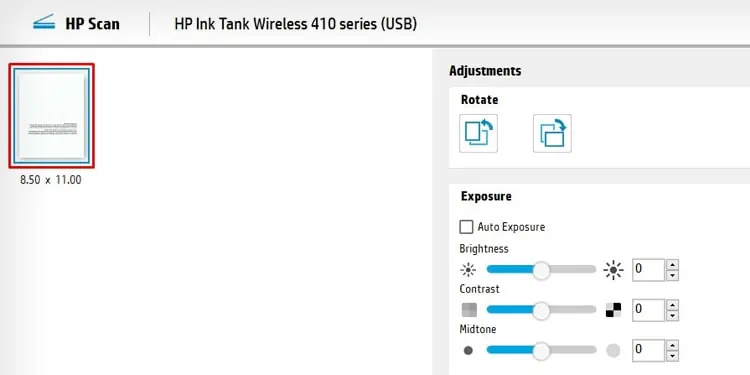
- You may Resize, Rotate or change the Exposure of the document.
- Click Save, once you make the necessary changes.
- Give a name to your file and click Save.
Using HP Smart
HP printer comes with a default application called HP Smart that allows you to print and scan documents. Here’re the steps to scan the documents using HP Smart:
- Place the document to be scanned on the scanner bed, facing the scanning side downwards.
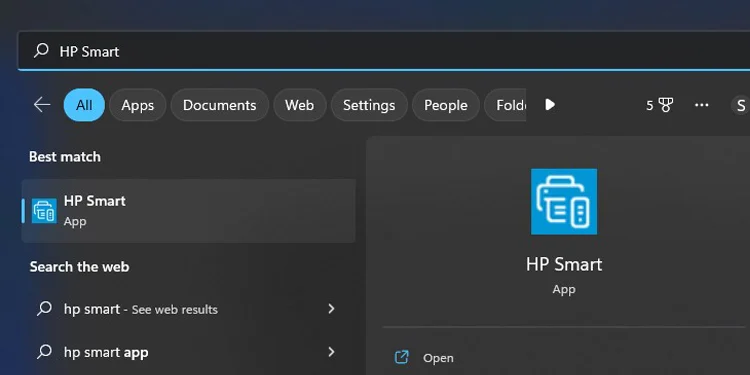
- Open the HP Smart app on your computer.
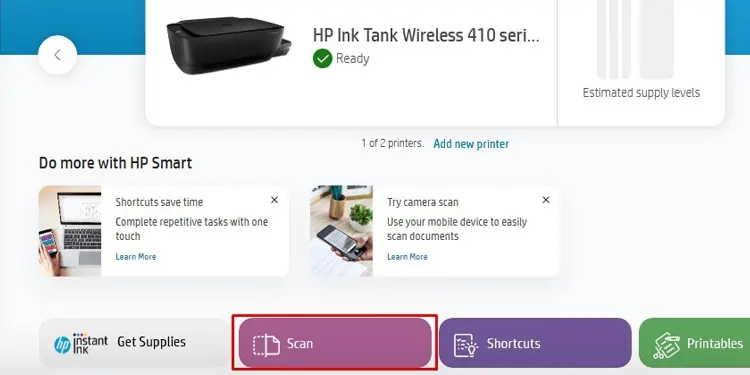
- Click the Scan tab on the home screen of HP Smart.
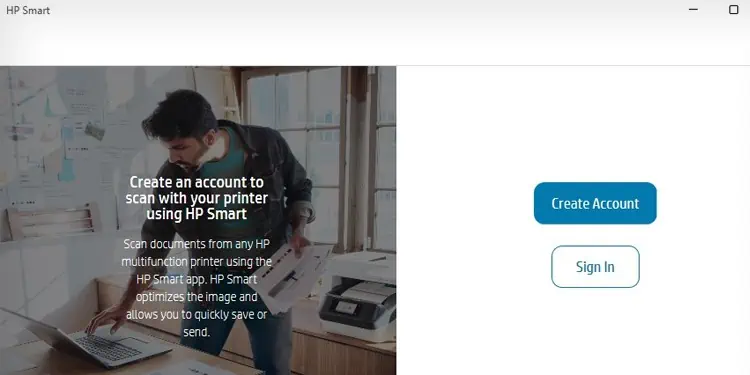
- If you already have an HP account, Sign In on the next screen. Or, create a new HP account and proceed.
- Once the Scan window opens, click the Scan button at the lower right corner of the screen.

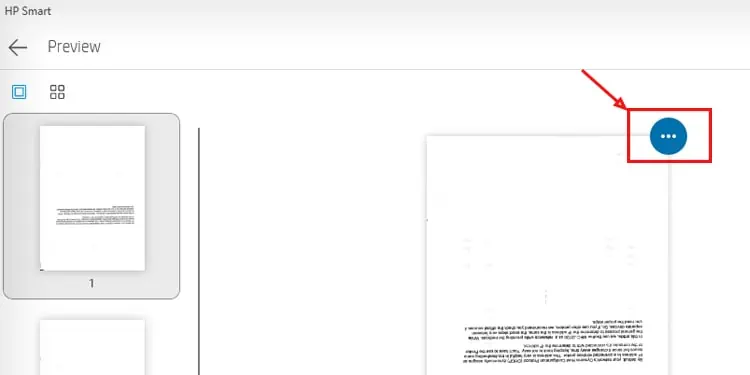
- It will take some time for the printer to complete the scan. Wait patiently until you see the scanned document on the screen.
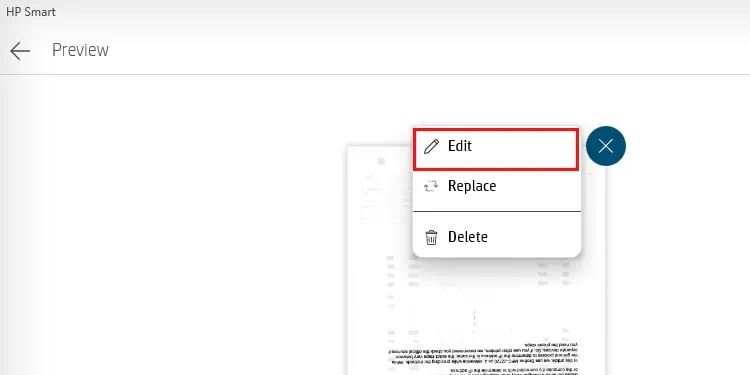
- Click the three dots menu on the edge of the scanned document.
- Click the Edit option.
- It will open a new window where you can crop the image, adjust the color profiles and apply filters.
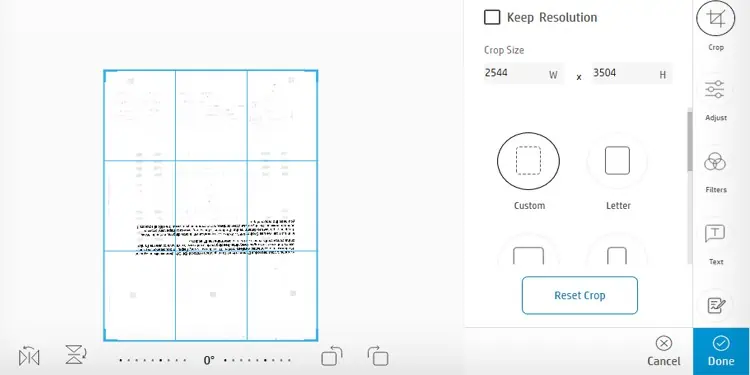
- Make the needful changes and Click Done.
- Now click the Save button to save the scanned document locally on your device. It will open a small pop-up window.
- You can either save it as a PDF file or an image (.jpg) file.
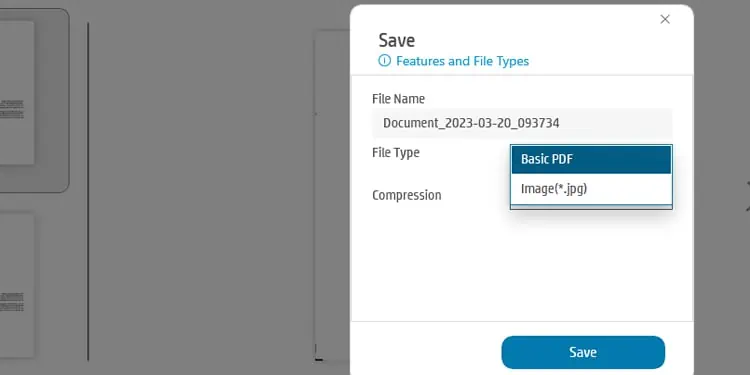
- You may also choose the compression levels.
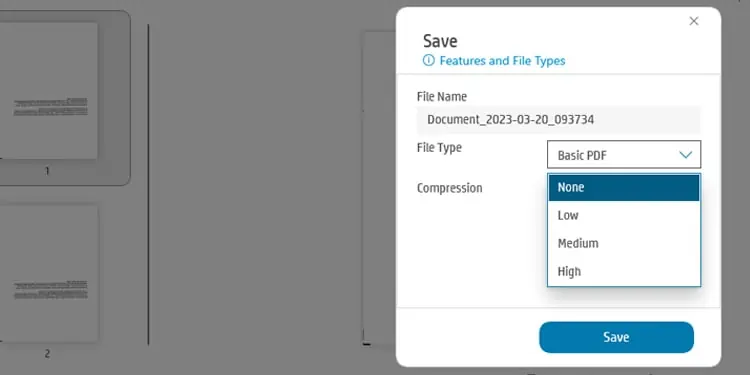
- Click the Save button.
- Give a name to the scanned document and save it to your desired location.